Kouign-amann
- Stacey Boocher

- Oct 12, 2022
- 6 min read

If you’re reading about my experience making Kouign-amann (kween-ah-mahn), then that means you’re starting to read about my final adventures baking out of Dessert Person (sad face/excited face). I’ve purposely saved the recipes listed as “very challenging” for the end of this project, which I highly recommend for anyone else baking through these recipes. This recipe requires time, attention and probably a couple attempts to truly get it right.
I should mention that I actually made the Kouign-amann at the same time I made the Cherry Cream Cheese Danishes because both recipes use the same techniques to form the dough. Looking back, I should have just made one recipe, then split it amongst the Kouign-amann and Danishes; I actually made two versions of the dough recipe, which definitely required extra attention to make sure I didn’t miss something for one of the batches.
For those wondering why this is considered such a complicated recipe, Kouign-amann requires lamination. It’s a process of layering the butter and dough together that takes time and patience. The final product gives you those gorgeous, flaky layers once the dough is baked (yes, someone has to actually create all those layers, something to consider next time you visit a bakery).
The ingredients for Kouign-amann aren’t too shocking; I already had most of it. I did, however, invest in European-style butter; I used what I believe to be the best butter out there (at least in the average U.S. grocery store), Kerry Gold. It ain’t cheap, but it’s damn good and hey, this is one of the finale recipes! Go big or go home.

The first few steps were very familiar to me. I combined yeast with water that was about 105°F and gave it time to puff up. Then I added more water with flour, melted unsalted butter, salt, and some sugar. I mixed this until it became a shaggy dough; after that, I kneaded it together on the floured counter for about 10 minutes. I was left with a soft dough that was limber and smooth. I’ve concluded that any dough that has any bit of relation to bread (basically if it includes yeast), it needs to get kneaded. Pretty much brioche dough, which is very sticky, is the only bread dough I’ve made out of this book that needs to be made with a stand mixer; everything else needs that time for the gluten to do its thing (truthfully, I don’t know what it’s doing, but it’s doing something) as air is being folded in with the dough each time. Once I had the right consistency with the dough, I placed it in a bowl with some flour, covered it with a damp kitchen towel and let it rise for about an hour.

While the dough was rising, I worked on the butter. Similar to making pies, it’s important to keep the butter and dough chilled as much as possible. I placed the butter pieces on parchment paper, then placed another piece of parchment paper on top. I rolled the butter out into a square, making it about a ½ inch thick with straightened sides. After wrapping the parchment paper around it, I placed the butter square back in the fridge to harden while the dough finished rising.

Claire has many small steps from this point on between the dough and butter. Once the dough was proofed, I placed plastic wrap on a baking sheet, pushed the dough down into a square, wrapped it, then placed it in the freezer for ten minutes. I’m very grateful Claire shows all the next steps with photos, otherwise who knows what I would have ended up with!
The first step involves unwrapping both the dough and butter, and placing the butter as a diamond over the dough. The dough has to be bigger than the butter, so I rolled it out a little bit. Then I folded the triangular flaps of the dough over the butter, pinching all the seams together.
The next few steps are easy, but honestly take forever. I rolled out the dough into a rectangular shape, basically as long as I could get it while making sure it was about a ½ inch thick. Then I folded it into thirds, bringing up the bottom part into a third, and the top part down over it. I moved this folded, smaller rectangle 90° so that I had the shorter side facing me, and repeated this process. Claire explained this is called a “turn” and creates the flaky layers, so at this point I had completed two turns. I then chilled the dough in the freezer for ten minutes, then placed it in the fridge for an hour.

When I worked on the next two turns, I sprinkled sugar on the dough both times after rolling it into the large rectangle again. I recommend using flour whenever needed to make sure the butter doesn’t affect the consistency of the dough; sometimes the dough would get so thin in places that the butter would start showing through, and I’d have sticky parts on the counter. Once I had completed the two turns, the dough went back in the freezer for ten minutes, then the fridge for an hour.

As I waited for the chilling from the final turns, I worked on preparing the pans, which can easily take up the entire hour the dough is in the fridge. Looking back, much of this seems pointless, which I’ll explain in a bit. I cut around 24 five-inch strips of parchment paper and buttered the crap out of my cupcake tins (I didn’t have muffin tins). I carefully placed each strip down into the cupcake cups, making sure the strips were sticking on the bottoms, corners and sides with some sticking out on both sides. I brushed more butter, then sprinkled sugar evenly into each cup.

Next, I took the dough out of the fridge and rolled it out into a large rectangle (wider than what I had been doing before). I used a wheel cutter to make the sides straight and sprinkled more sugar on both sides of the rectangle. After that, I cut the dough into 24 even squares. At this point, I focused on only making the Kouign-amann, placing the other batch of squares for the Danishes in the fridge.

Similar to folding a paper fortune teller as a kid, I folded the corners of one square together and slightly pinched them together, placing them in the cupcake tin one at a time. Some of the folds looked better than others. At this point, I was very tired and anxious to get these things baked and completed, but the dough needed to rise yet again. I placed plastic wrap over it and let it proof for 35 minutes. Finally, after all this, I placed the massive cupcake tin in the oven for 25 minutes.

And this is where I freaking messed up!
As I neared the directed amount of baking time, I looked back at the directions to discover I should have reduced the heat from 400°F to 350°F right when I placed the Kouign-amann in the oven. My first thought was ‘eh, what’s 50 degrees going to do.’ Well, that thought was quite inaccurate. I looked in the oven to discover the Kouign-amann was getting burned! After all that work, all those hours, they were looking like crap. I was semi-devastated.

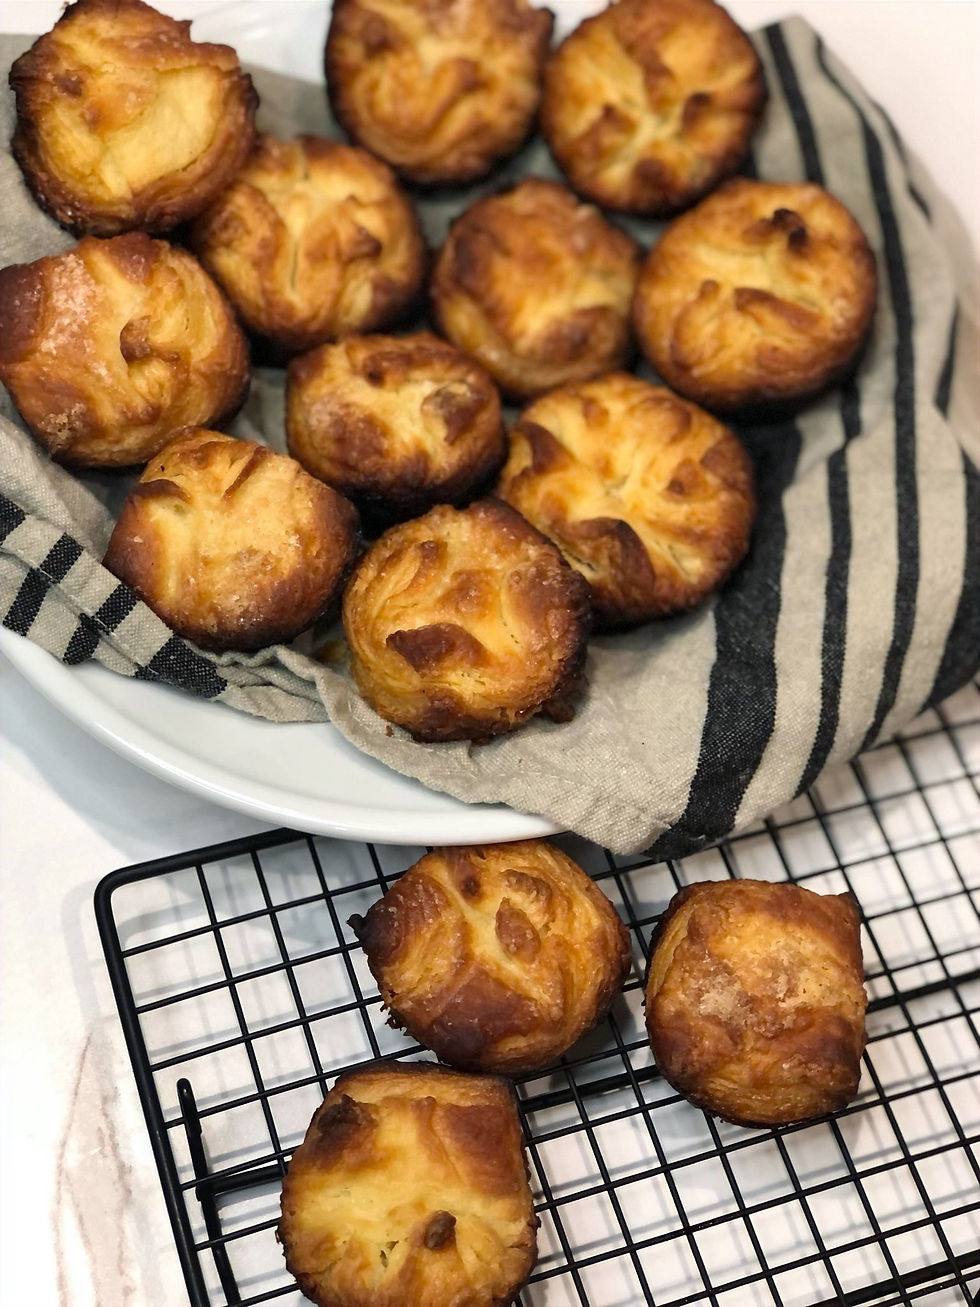
Of course, I took the Kouign-amann out immediately. About half of the flaky cups could be salvaged, but this was not how I planned to wrap up this process. Not only was this part a huge disappointment, but the parchment paper strip process did absolutely nothing to get these things out. I was left with the biggest mess of a cupcake tin I’ve ever seen in my life, and the sides of the Kouign-amann were just hideous. The sugar in the tins did not help at all. Lesson learned; I need to actually buy some light metal muffin tins. It took me around a half hour to clean the cupcake tin; as someone who hates dishes, it was gross.

Despite the stressful end to this long, tedious baking experience, the Kouign-amann that did turn out were very delicious. It is worth taking a moment to appreciate the layers when you bite into this flakey bread creation (I don’t know what to call this thing, is it a pastry, a bread, a muffin?). I will note, however, that many bakers I’ve connected with on social media have taken the same lead in making this recipe with the Cherry Cream Cheese Danishes, and once you have one of those, you will be bored with this recipe. The Kouign-amann is a great base for learning lamination, but it is certainly a base in my opinion; there’s so much more to offer with this flaky dough, so if I ever make this recipe again, it’ll be to make a Danish or turnover. I am proud of myself for learning this technique; it really is the beginning to learning a whole new array of intricate desserts!

While Claire has not made Kouign-amann on her YouTube Channel, she did show the lamination process with this Pigs in a Blanket recipe. I highly recommend watching this before you start this recipe; I’ve tried to bake her recipes, then watch the videos so I can see where I did things differently or had similar thoughts as Claire, but when it comes to the “very challenging” recipes, I think it’s totally fine to watch ahead of time to save yourself the time and stress!


Comments